Two weeks ago I informed you about the release of version 1.4 of the Visual Jobs Scheduler, our add-in for visual project planning in Dynamics NAV. Since the features are so powerful I could only briefly outline them. In the meantime you may have tested some of the new features and perhaps have seen for yourselves how mighty and comprehensive they are. As I promised, I’m writing today to dig deeper into one particular feature. As it happens, a customer asked for this feature explicitly and so I’m sure it will be of great interest to most of you.
Modify time scale and change focus by one click
You know the problem: You have to keep track of lots of projects and sometimes you wish for a quick change of focus on, say, a certain week or month or you want to quickly bring into view the work date without having to keep scrolling and scrolling. Wouldn’t it be great if you could modify the time scale solution by just clicking an icon? And – what’s more – if all bars that are not within the specified range get hidden? So that you can exclusively focus on the time range that is currently important for you.
The solution we have found resulted in adding new functions which can be used by buttons in the menu ribbon that the partner has to create in the CA/L code.
These functions are:
- DayView
- WeekView
- MonthView
- FilterToShownTimespan
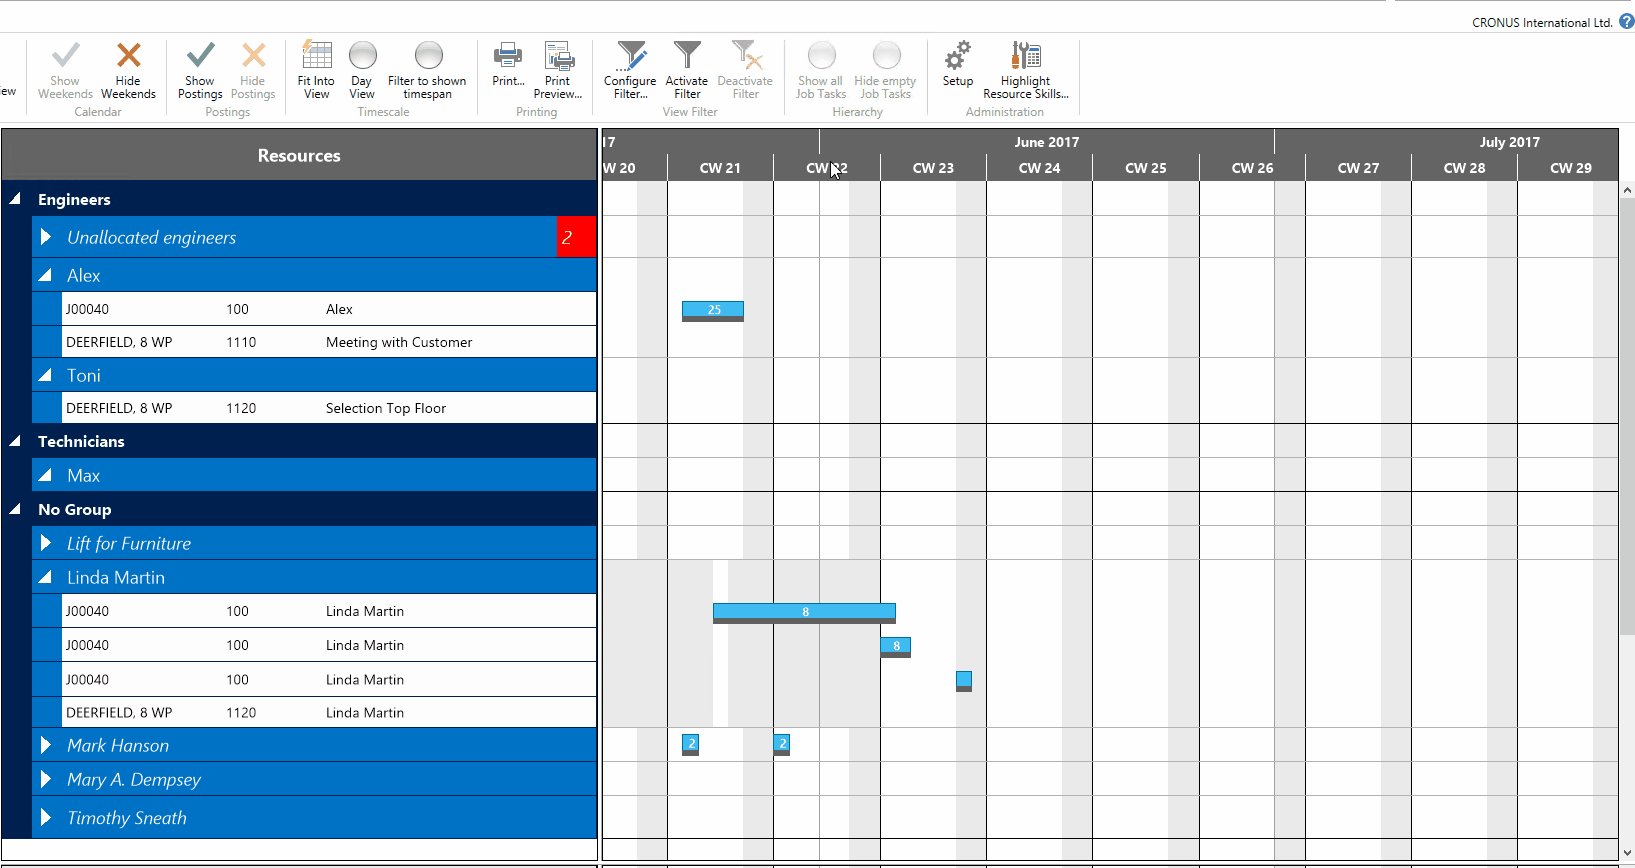
Option #1: Reduce the number of displayed bars according to the time scale range
The function FilterToShownTimeSpan lets you show bars fitting a specified time range by one mouse click. Since this function can also be used for complementing the three time filter functions, I’ve put its explanation at the beginning of my post. The way of creating icons applies to all four functions.
Please note that FilterToShownTimespan will only filter bars in the Resource View.
Modify the CA/L code
- In the Page-Action Designer of Table 5416100 create a new action in the desired ActionGroup (here it would make sense to select “Timescale”).

- After this, make your choice in the CA/L Symbol Menu as shown below:
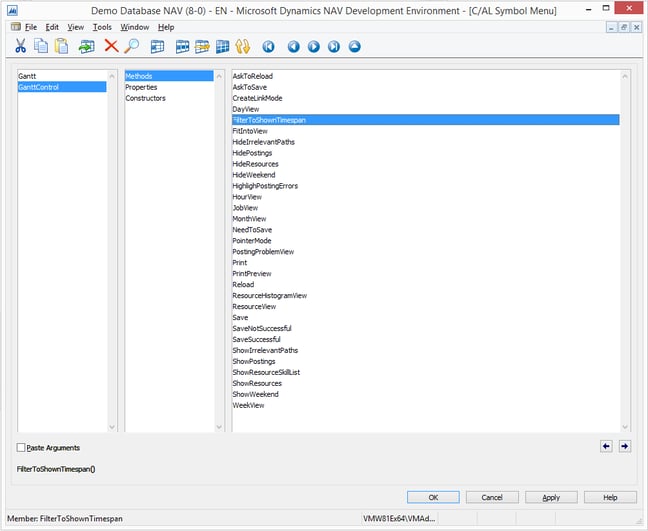
- In the CA/L editor, enter the according line:

If you want to use these lines in your solution you can copy them:
CurrPage.GanttControl.FitIntoView
CurrPage.GanttControl.FilterToShownTimespan;
The result
A new symbol will appear in the menu ribbon  .
.
Every time you use this icon, the VJS will only show the bars that fit into the time range you have set with your timescale solution.
Just one word of caution ... and a best "practice"
Please note that the function FilterToShownTimespan is kind of a one-way-street, meaning that there’s no direct way to undo it. There is, however a way to get around this. Just customize the Fit into View icon by modifying the corresponding action in the CA/L editor as shown below:

Clicking the icon ![]() then will result in:
then will result in:
- setting the time range back to the start and end values specified in the Setup menu (FitIntoView)
- showing all nodes in the specified range (FilterToShownTimespan)
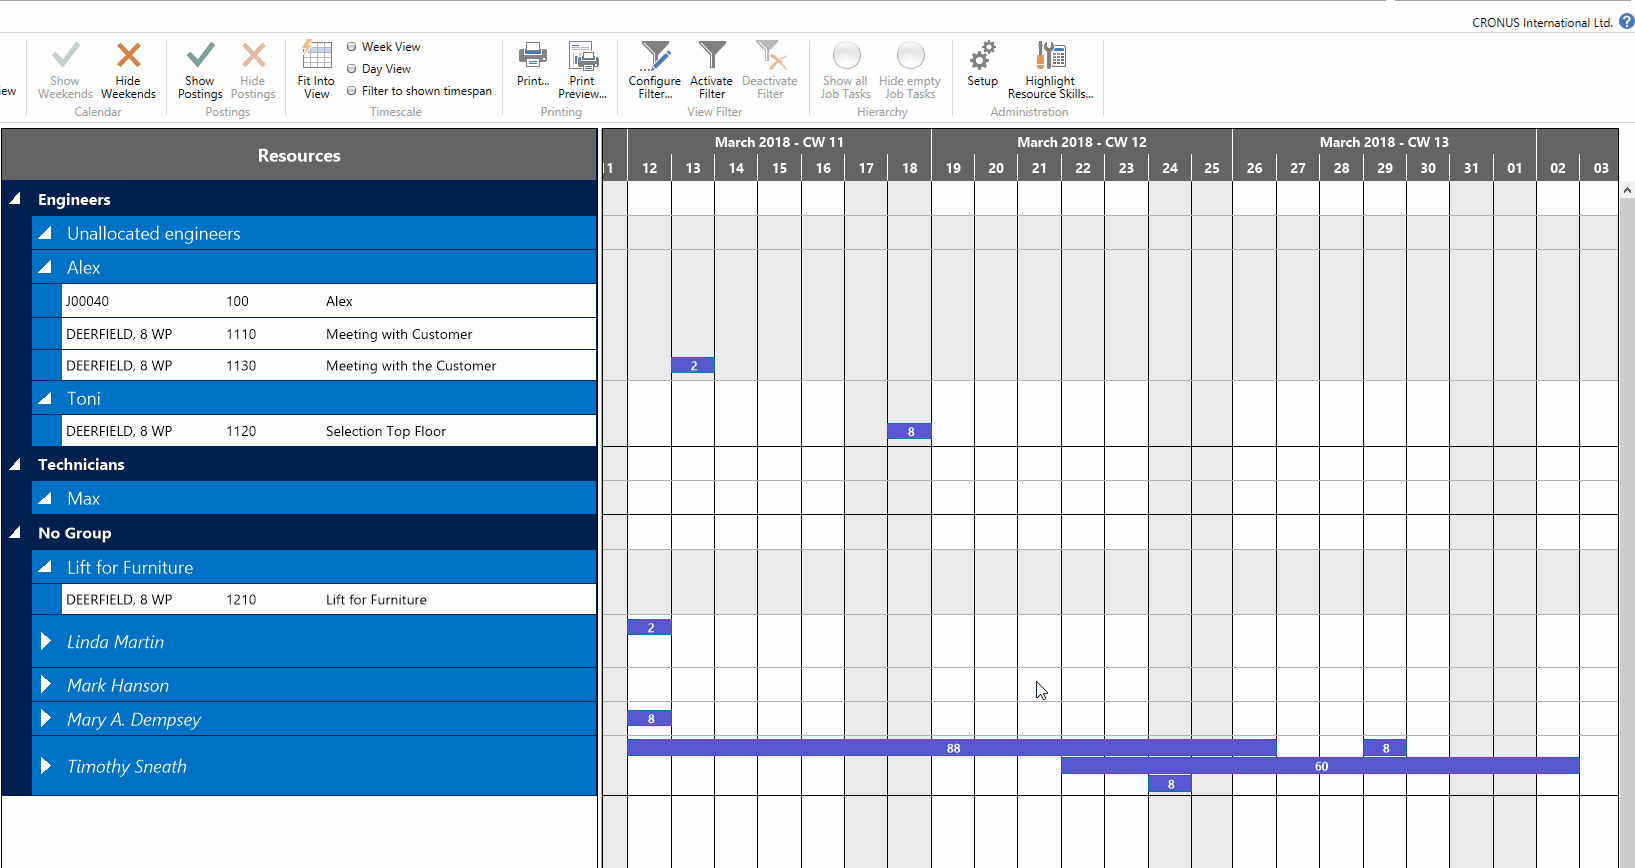
Option #2: Quickly change the timescale solution to a predefined time range
Use the new time filter functions for quickly changing your focus to
- the work date by DayView
- a week by WeekView
- a month by MonthView
Modify the CA/L code
The modifications of the CA/L code are done just the same as described above. If we take WeekView as an example, the according CA/L code has to be changed as follows:

If you want to use these lines in your solution you can copy them:
CurrPage.GanttControl.WeekView;
A new symbol will appear in the menu ribbon ![]() .
.
Every time you use this icon, the time scale will switch to a weekly view of the week that had been shown at the left.
Option #3: Refine the time filter functions by only showing bars within the specified time range
If you try your newly created time filter Week View icon, you will notice that however quickly the displayed time range has been changed, the bars not lying within this range are still being displayed. So if for the sake of greater clarity you want to hide those bars, you should add the FilterToShownTimespan function to the WeekView action:
![]()
Now clicking the Week View icon changes the timescale solution to one week and hides the bars lying without this range.
More information
- Webinar about selected features of the VJS and the VPS.
- Some best practice wanted? Read about how to ease project planning in Dynamics NAV by hiding empty tasks
- Free ebook about Visual Scheduling for Microsoft Dynamics NAV: