Two weeks ago, I told you about the new feature for customizing the VPS conflict management that was developed as a result to a frequently posed partner request .
Of course, also questions on other themes arise every now and then and ones that reach us quite frequently concern the filter functionalities. Since this complex issue would go beyond the size of one post, I decided to split it into a series dealing with the different kinds of filters in the Visual Production Scheduler, and when and how to use them.
Additional focus by filters
Individual filters are additional, important functions of graphic planning boards to provide planners with a zooming option to be able to focus on certain sections of their planning, thus easing their planning decisions.
Two kinds of filters
The Visual Production Scheduler offers two kinds of filters, their difference being the time of application, which, of course, leads to different results. Find below a desription of the Data Filter.
Data Filter speeds up loading data
The settings of the Data Filter are evaluated on starting the VPS so that only the filtered data of NAV are passed to the VPS. By reducing the amount of data being loaded, the loading process gets sped up. The planner can directly view parts of the plan that are currently important to him. For instance, a planner is responsible only for one certain machine group and therefore does not need to view other groups. So he could set the Data Filter in a way that only this particular machine group is shown right from the beginning.
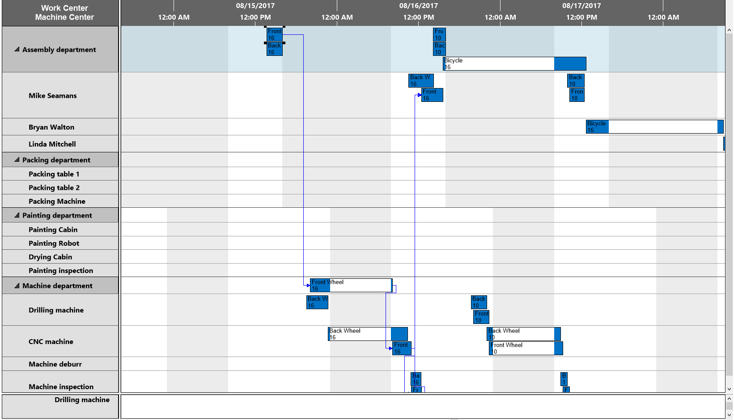
The picture below shows an unfiltered plan in the "Capacities" view:
How to define settings for the Data Filter
If you want the VPS to start with showing only the Assembly department e,g, the following steps have to be carried out
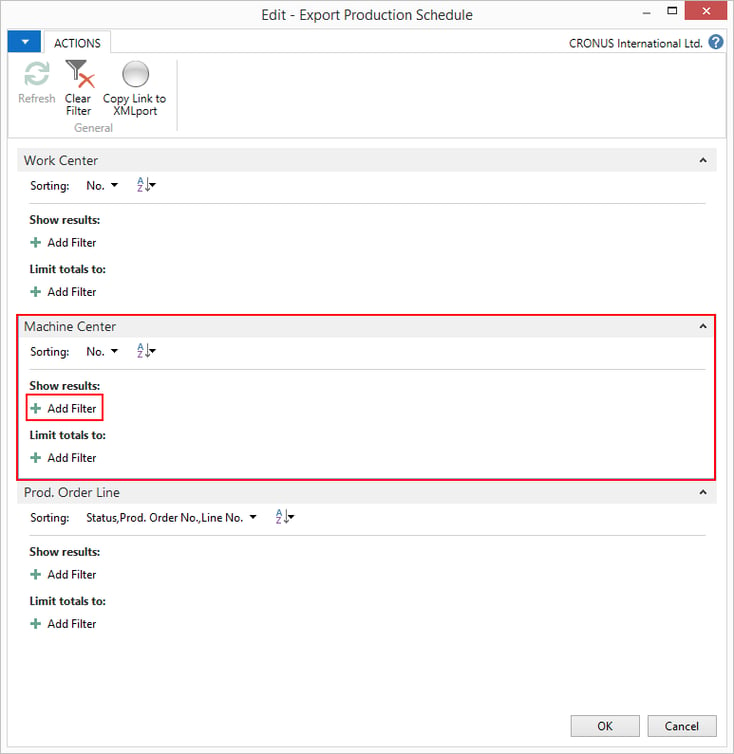
- Click the "Configure Filter" button in the "Setup" dialog.

- Click the "Add Filter" icon in the "Machine Center" section
- Select "Work Center No." and "Assembly department" from the corresponding dropdown lists:
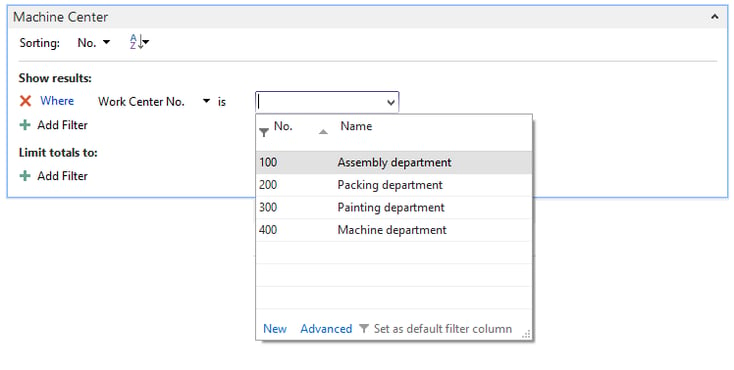
- Confirm your changes and your new filter appears in the "Data Filters" as "Machine Center" Filter. From now on, the VPS will be loaded only with data matching this filter.

As a result of the changes, your plan now looks like shown below: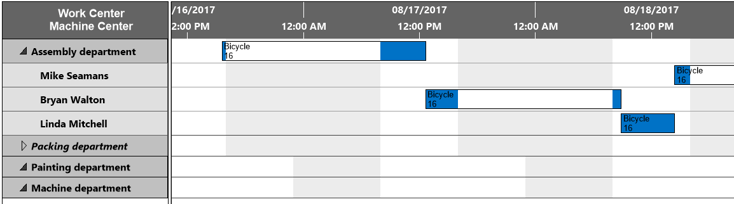
Please note: Though the other work centers are still displayed in the table, they can't be expanded and no relating bars will appear in the diagram area. The planner can focus on the planning area that is important to him.
To sum up
Filter options in the graphical planning boards enable the planner to concentrate his decisions on specific parts of his area of responsibility without losing collective coherence. By reducing the amount of data to be loaded into the VPS, the Data Filter speeds up this process significantly.
What comes next
In my next post of this series I will explain the "View Filter" which is applied to data having already been loaded into the VPS, i.e. on viewing them.
More information
- Read about the 3 Most Loved Features of the Visual Production Scheduler for Microsoft Dynamics NAV
- Watch our webinar about production planning with NAV with the Visual Production Scheduler.
- Learn more about Visual Scheduling for Microsoft Dynamics NAV in this ebook: