In our previous "rapid start with VARCHART XGantt" blog series we showed you how to modify the time unit and the time scale .
With this post, we aim at helping you to achieve the next step in developing your (sample application). Hence, with this article we give you an insight in the benefits and ways of grouping your activities in a Gantt chart.
Why to Use Grouping in the First Place?
Grouping helps to structure a Gantt chart and allows viewing the same data and information from different angles. To get an idea, have a look at one of our samples being included in samples that you installed with the VARCHART XGantt .NET Gantt control.
One "Small" Application - Manyfold Visualization Options
The 'Reservation Planner' visualizes the booking plan for software courses. It may not be a "big" plan with lots of data to handle, but nevertheless, even in a "small" plan like this you have to deal with the question of which aspects of your data you want to emphasize, i.e. from which angle you want to look at your data.
Three Grouping Options
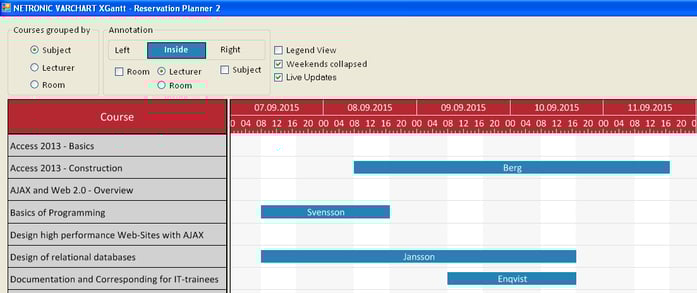
Our plan offers three ways of visualizing the occupancy.
- Grouped by Subject: gives a quick overview of the alphabetically sorted courses: date, time and respective lecturer or room
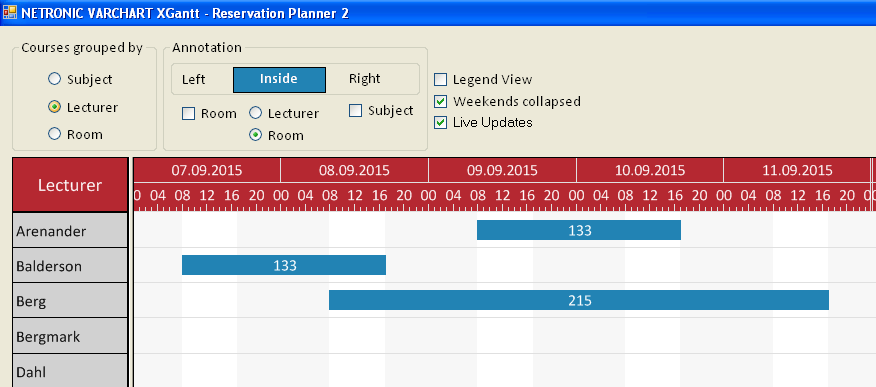
- Grouped by Lecturer: lists the lecturers in alphabetical order and shows their capacity with regard to date, time and room.
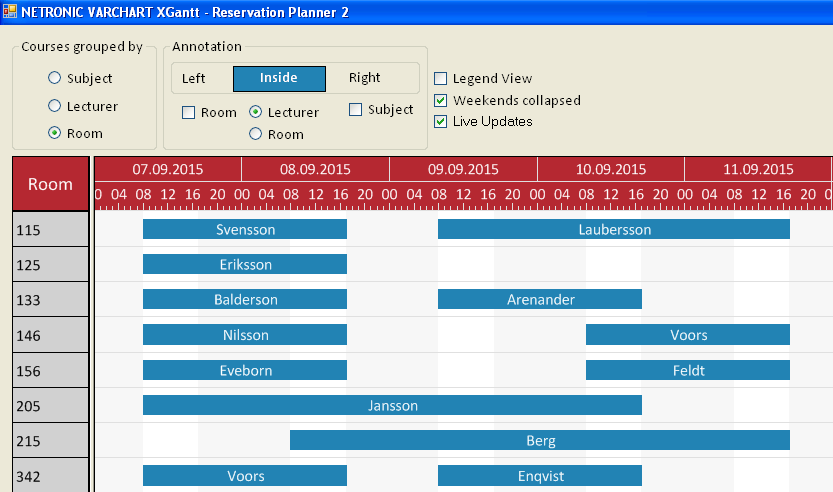
- Grouped by Room: visualizes the room occupancy by the respective lecturers, thus quickly showing which room could be used at a certain time.
Even this small example shows how grouping data contributes to providing a clear-cut overview of planning data. This is even more the case when the data amount to be visualized is far greater than in the Reservation Planner and hence the entire plan becomes more complex to read.
So, how can data be grouped in our .NET control?
Grouping of Activities in XGantt
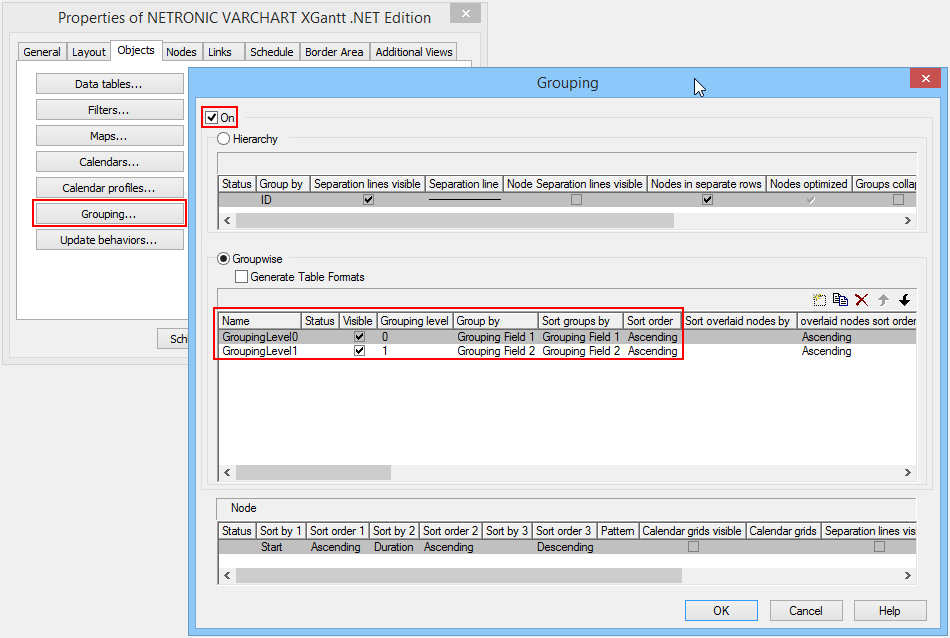
Groups are formed by a value, that all members of a group have in common. Nodes that show the same entry in their grouping data field belong to the same group. The grouping field and all other grouping criteria can be set in the corresponding dialog which you can reach by clicking the "Grouping" button on the "Objects" property page.
Switch on the grouping by ticking the "On"box. Create two GroupingLevels according to the following screenshot:
The result is shown below:

Click on the little triangles next to the group title to collaps or expand the groups. This feature may have to be activated before by ticking the Modifications allowed check box in the Grouping dialog.
Your next steps
Of course, there are far more options available in the Grouping dialog than presented here. If you want to find out more about this function or any other aspect of our .NET Gantt control, we support you by providing a very comprehensive developer's manual, which we highly recommend to use. In addition to this, you can also download our free whitepaper offering 11 Gantt chart best practice tips including code snippets: