New software, new struggles, right? Let’s hope not! So, you’ve got the Visual Jobs Scheduler (VJS) or the Visual Production Scheduler (VPS) for Dynamics 365 Business Central, you understand the basics but can’t seem to fully get it? That’s fine! Let me tell you something. You have a visual scheduler installed because someone thought it was a good idea.
And here’s why. With a visual scheduler, you can view all your orders at a glance, and you can change the production dates and resources. You can even create links between orders or jobs and much more, by only using your mouse. There’s no need to drown in dozens of Business Central cards anymore. The first step to embracing it is to own it. No, I don’t mean the license, but to personalize it.
In this blog, I will address the steps to personalizing your new visual scheduler. And, I will refer you to our articles on the topic for clearer instructions.
.png?width=850&name=Twitter%20examples%20(3).png)
Now, let’s go by steps:
1. Filter to your duties
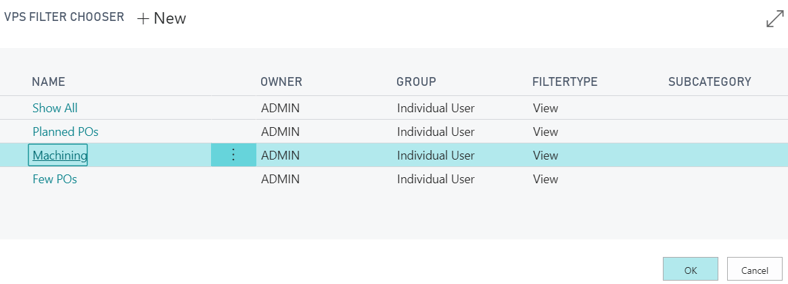
The most important thing is to make the schedule feel like yours. You can define a filter to illustrate only the orders you're responsible for. With a personal filter, you can focus on what matters for you. Let's say you're in charge of machining, you can filter by showing only this work center as seen on the picture below. Instructions here: For VPS or, For VJS.
 In addition to this: we actually have so much power in our filter options, that we spent a 60 minutes webinar on it. Watch it here to see what you can achieve with combining data filters and view filters.
2. Define your preferred time-span for your schedule
 Whether you prefer to work by year, semester, quarter or anything in between, You can set up the time-span accordingly.
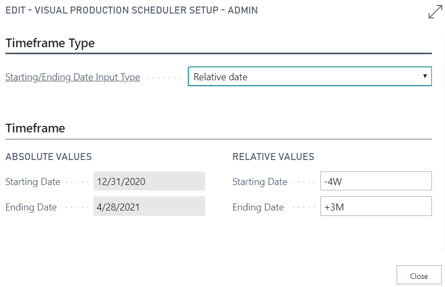
The time-span or “timeframe” is the time range your schedule covers. You can select an absolute value, for example a calendar year or a project duration; or make it relative to the workday from the setup configuration such as the next quarter. (Instructions here: For VPS, For VJS).
3. Choose whether to see or hide the non-working periods
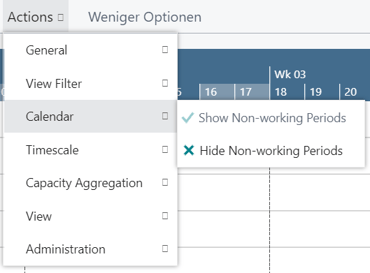
Some planning situations require to focus on the working periods of a work or machine center only. If this is your case, you can easily hide them.
Or if you’re working with a 24/7 schedule for some machine centers then it may be better to have a full overview of the schedule. To show or hide the non-working periods, check the steps here: For VPS, or For VJS.
4. Establish how rescheduling works better for you
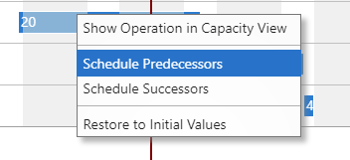 If you want to work ahead on an operation, or you'd like to postpone it. Then, here's where production planning gets interesting. On the VPS you can choose how moving an operation will affect the linked preceding and/or succeeding operations. This can be done manually with a right click and decide which linked operations to schedule.
On the other hand, you can set up an automatic scheduling of all predecessors and successors for all operations. This might work better for you, when you like all the linked tasks and operations to move closer to your working day or further. You can set up that preference following the steps here: For VPS.
5. Tailor the zoom and column width of your working area
 You can adjust most elements on the working area to fit your needs. You can increase or reduce the time scale resolution with your mouse wheel. On the other hand, you can choose from one of the most common scales on the Actions ribbon: workday, work week, work month or fit into view to see the whole project or planning period.
You can modify the width of the column to by dragging the vertical splitter bar next to the diagram. Check the description here: (For VPS plus this for VPS, For VJS and also for VJS)
6. Decide what information to show in your tooltips
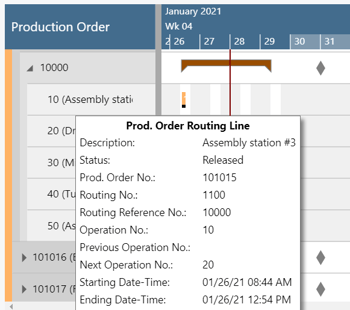
The tooltip is there to help you identify important information of an order or job in no time. The tooltip appears when you hover on a Production Order, Job Orders, Work Centers, Machine Centers and other Business Central elements. For this reason, it is important to enlist what matters to you: whether is the description, the status, the part number, quantity, previous and next operation or job, etc. You can select what information to show from Administration > Set-up. The step by step guide can be found here.
7. Highlight those priority jobs 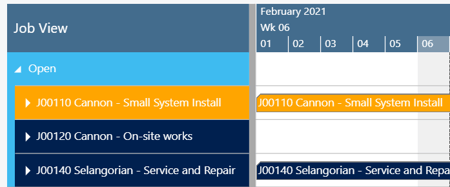
On the VJS, you can distinguish a priority job from the rest by choosing a different color for the bars.
The color will help you spot them right away to help ensure the planning goes smoothly. Check this option here: Only for VJS.
I wish these steps help you towards a better use of your Visual Scheduler in your daily life. Make sure to share them with your team so everyone can work on a personalized scheduler.