Are you struggling to find the easiest way to manage your production schedule? Through our clients, we have seen a long list of scheduling “solutions” that may sound familiar to you. Let me list a couple: Corkboards with tacks, whiteboards, Trello, the famous Excel spreadsheet, and most likely now some sort of "ERP scheduler" if you have been using Microsoft Dynamics NAV or Dynamics 365 Business Central.
Independent of which tool you use: If you are a production planner, chances are high you may struggle with keeping up your scheduling, and you may not know where to start (as there is so much to take into account when getting into a new ERP).
There is no one to blame. The combination of ERP and scheduling is far from being trivial, most manufacturing companies vary, and getting used to a new procedure can be overwhelming. In this blog, we will share with you the proven 5 steps and the tasks you need for a smooth start into production scheduling (and its mastering).

Step 1: Define your scheduling goals
“You’ll get nowhere if you don’t start somewhere”.
The first step towards a successful scheduling software implementation is to define what success would look like to you. In other words, “what do you want to achieve?”
To do this, we recommend taking 3 actions:
Task 1. Brainstorm improvement ideas
To know what to focus on, we need a greater picture of what we want. For this reason, you can start by listing general areas of opportunity regarding the implementation of production scheduling. It is important to note all ideas or intentions should be written in the first person as this should represent what YOU are looking for.
 The brainstorming could look something like this:
-
- I want to know what causes my production orders to be late.
- I want to be able to take holidays knowing my team can follow the schedule we created.
- I want to leave the office knowing everything is set for the rest of the day or weekend.
- I want to be able to commit to the delivery times I told my customers.
- I want to have enough time to eat in the cafeteria and not my desk.
Task 2: Turn your ideas into goals.
Now that you have the list of general ideas, you must convert them into specific goals. This means to make them actionable. You may have heard of the SMART criteria, which we totally encourage.

This criterion describes that a goal should always be:
Specific / Measurable / Attainable / Relevant / Time-Bound
Here is an example:
-
- Idea: “I want to be able to commit to the delivery times I told my customers”.
- SMART goal: “I want to finish at least 85% of my production orders in time within the next 6 months.”
Task 3: Prioritize your smart goals.
Once you know what you want to achieve it will become easier to order which are a must and which would be great to have. I listed 6 goals. Therefore, in my case, I would order them from 1 to 6.
To help you order your goals, you can also apply Pareto’s Law. It will help you with the process of deciding which goal to pursue first. Also known as the 80/20 rule, Pareto’s law is nowadays one of the most helpful concepts for life and time management.
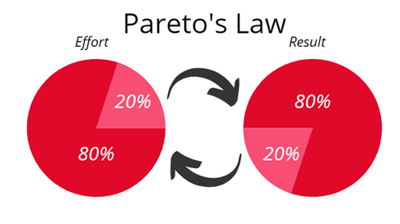
The law suggests that roughly 20% of your efforts and activities will account for up to 80% of your results. In other words, it implies that roughly out of my six activities on my sample to-do list will be worth the same as the five other activities put together.
So how does this translate to scheduling?
It’s time to look at your smart goal list again and to ask yourself: If I could succeed in one of these goals, which one would help me the most?
Step 2: Determine the scheduling requirements to help you attain your smart goals
Identifying and prioritizing goals is a must. After that, we need to analyze what can help us achieve them.
Let us follow up on the example above. The goal is “I want to finish at least 85% of my production orders in time within the next 6 months.”
 My requirements would include:
-
- My system should remind me of my production finish dates and the actual delivery dates at one glance.
- Visual alerts should appear when a delivery date could be compromised.
- If the latter happens, I want to know how late I am.
- I also want to recognize what options I have to fix my lateness. For example, if I can switch positions for an operation, use another machine, etc.
- Lastly, I want to know how those options will affect the previous plan.
This list will help you recognize whether scheduling software would work for you in the long run.
Implementing a new scheduling process and maintaining it requires time and money. For this reason, you should always know what features you’re willing to slip and which not.
Step 3: Prepare the data relevant to scheduling.
 The more you know your plant, the better you can work with this. For this reason, in this step, I ask you to gather all information you will require no matter which scheduling extension you implement. At this point, you must ask yourself: What input data do I need to successfully run my production schedule?
Keep in mind: scheduling is nothing else than balancing demand and supply - in that case: the supply of your internal capacity with the demand for it (coming from your production jobs).
Hence, we have two main building blocks: Production orders and machine/work centers. To get an informed schedule you must gather the information related to both.
Task 1: Arrange your capacity data (internal supply)
-
- List your machine centers.
Machine centers make up the capacity to complete the operations of your production process. For this task, you must list all available resources, from machines and workstations to employees. - Group your resources.
If you identify resources that can do the same or similar tasks you should group them as a work center to have a better structure. You should end up with a list like this:- CNC machines: CNC machine 1, CNC machine 2, CNC machine
- Milling machines: Milling 1 and Milling 2
- Add your standard shop calendar
At this stage, you should add the default calendar for each work center. Morning shift Monday to Friday? Afternoon shift Monday to Saturday? 24/7? This is required as this calendar defines when your machine centers are available. Thus, the shop calendar is crucial to define your capacity.
- List your machine centers.
Task 2: Arrange your production data (internal demand)
-
- List your production orders.
Make sure to add an identifier such as the production order number or description. Next, specify the earliest start date if you have one, and the due date.
-
- Define a production order by its routing.
Now you need to list all the operations that form your job in the right sequence on the routing card. Along with more descriptive information, such as:
-
-
- Task number to identify it.
- Specification of the successor task.
- Average time required for the task.
- The responsible resource.
-
With these two types of data (machine center plus shop calendar and production orders plus routing) you are set to start with production scheduling.
Step 4: Talk to scheduling software vendors
Personally, I love to get free trials for apps (even when the app price is only $2.99 USD). But if you’re anything like me, you’ll install a free trial, will play around for some minutes trying to figure out what’s on the screen, and when it feels too hard to use, you will simply close the window. Then, days or weeks later wonder why the software installed, and delete it.
Do you see where we’re going with this? Not all apps or software can be learned in seconds. Especially when it comes to Business Central as your ERP system.
There are many scheduling extensions claiming to be a breeze to use. Some will offer a free trial or some even a free account, with restricted functions of course. But there is a problem with this: Solutions that are easy to use, especially when free, are very likely to be simple and lightweight. Meanwhile, production scheduling is a monster task. An easy and simple software will not make the trick.
All of this is to say, do not try to figure it out on your own. There are many account executives like me who will be happy to demo the software for you for free.

- Message the vendor, get on the phone with them, schedule an exploratory session, ask your questions, just inform yourself of the options that cover your prioritized list of requirements.
- You can book one exploratory session with us here 😉. Additional perks of working with NETRONIC are the languages: we can help you out in English, German, Spanish, French, and Tagalog.
Step 5: Make use of an onboarding service.
 As I mentioned before, you could try many Business Central extensions for free, but you are likely to not get the most the extension can offer.
If you want to implement a new production scheduling software and to keep using it, you should consider getting guidance through an onboarding program.
At NETRONIC, we put together our expertise, our best practices, and our scheduling insights into our onboarding service that we call Quick Start Package. This package is tailored to fit your needs and scheduling goals at an affordable price. Make use of it.
Want to learn more?
Or you can already take the 4th step and talk to us software vendors for a free consultation. It all starts with a meeting. Book that meeting now :)